How to Tighten Garage Door Chain: A Simple Homeowner Guide (2026)
Go Back To Previous PageIf your garage door is making noise, moving unevenly, or not opening smoothly, the chain may need adjustment. Over time, the chain can loosen, which affects how the opener works. If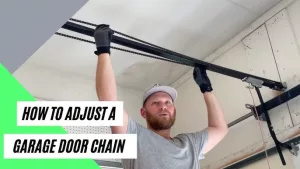 you’re wondering how to tighten a garage door chain system or how much tension is correct, this guide will walk you through the basics in a simple, practical way.
Why Garage Door Chain Tension Matters
The chain on a garage door opener helps lift and lower the door. When the garage door chain tension is off, it can cause several issues. If the chain is too loose:
- The door may jerk during movement
- You may hear rattling or slapping sounds
- The opener may not work efficiently
If the chain is too tight:
- It can strain the motor
- Parts may wear out faster
- The system may become noisy
Keeping the right tension helps the system run smoothly and safely.
How Tight Should a Garage Door Chain Be?
A common question homeowners ask is: How tight should the garage door chain be?
The chain should be:
- slightly loose, not completely tight
- able to move a little when pressed
- not sagging excessively
In most cases, a small amount of slack (about 1/4 to 1/2 inch) is considered normal, but this can vary slightly depending on the opener model. The goal is to avoid both excessive looseness and over-tightening.
Signs Your Garage Door Chain Needs Adjustment
You may need to adjust the chain if you notice:
- loud rattling or banging noises
- uneven or jerky door movement
- visible sag in the chain
- slower operation than usual
These signs often point to incorrect garage door chain tension.
How to Tighten Garage Door Chain Step-by-Step
If you’re looking for how to tighten a garage door chain, the process is usually straightforward.
Step 1: Disconnect Power
Before making any adjustments, unplug the garage door opener for safety.
Step 2: Locate the Adjustment Bolt
Find the adjustment bolt or tension nut on the opener rail. This is usually near the front of the unit.
Step 3: Tighten the Chain Gradually
Use a wrench to turn the adjustment nut.
- Turn slowly and, in small increments,
- check the tension after each adjustment
Avoid tightening too much at once.
Step 4: Check Chain Slack
After adjusting, check how the chain sits.
It should:
- have a slight amount of slack
- not hang loosely
- not be fully tight
This step is important for getting the correct balance.
Step 5: Test the Door
Reconnect the power and test the door.
Watch for:
- smooth movement
- reduced noise
- proper opening and closing
If needed, make small adjustments until the tension feels right.
Common Mistakes to Avoid
When learning how to tighten the garage door chain, it’s easy to make a few mistakes. Avoid:
- over-tightening the chain
- skipping safety steps
- making large adjustments too quickly
- ignoring manufacturer guidelines
Small, careful adjustments are the best approach.
How Often Should You Check Garage Door Chain Tension?
You don’t need to adjust the chain often, but it’s a good idea to check it periodically. A simple rule is:
- Inspect every 6 to 12 months
- Check after noticing unusual noise or movement
Regular checks can help prevent larger issues.
When to Call a Professional
While adjusting chain tension is manageable for many homeowners, there are times when professional help is needed.
Consider calling professionals like Cedar Park Overhead Doors if:
- The chain keeps loosening
- The opener is still noisy after adjustment
- The door is not operating properly
- You are unsure about the process
Some issues may involve internal components that require more than simple adjustment.
Final Thoughts
Learning how to tighten garage door chain systems can help improve performance and reduce noise. By understanding proper garage door chain tension and knowing how tight the garage door chain should be, you can keep your garage door running smoothly and avoid unnecessary wear. A quick adjustment and regular checks can go a long way in maintaining your system.

Georges has been working in Wall Street for the last 16 years trading derivatives with hedge funds. He has been an active real estate investor for over a decade. Georges graduated from HEC Business School in Paris and holds a master in Finance from ESADE Barcelona.